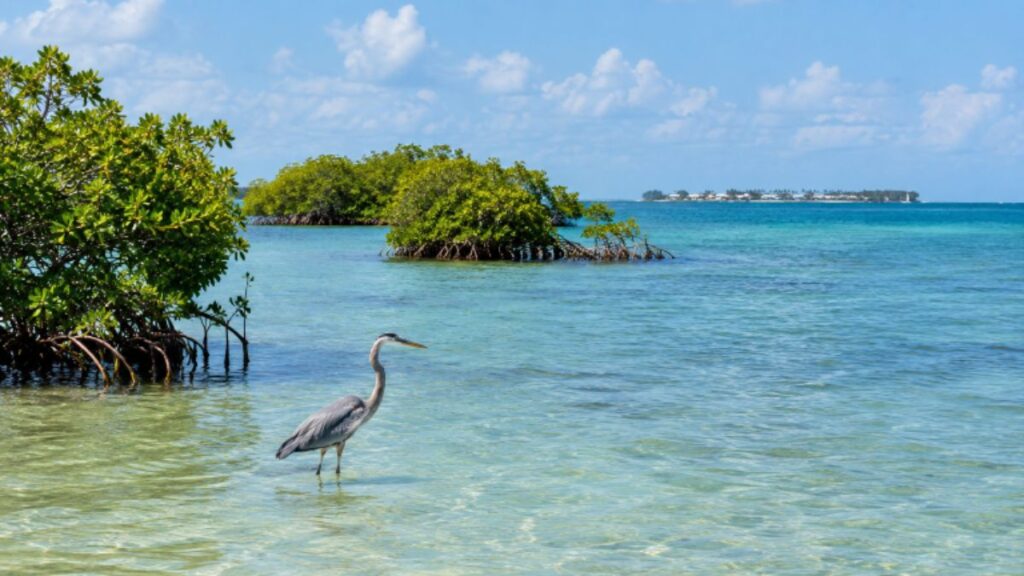
Key West offers a distinctive setting for nature photography, where open water, mangrove islands, coastal birds, tropical vegetation, and changing weather can all appear within a single outing. Whether you are working with a phone, a compact camera, or a long lens, wild life photography Key West is most rewarding when the goal is not simply to collect images, but to pay closer attention to the living landscape. Successful fieldwork is rarely about rushing toward the nearest subject. It is about noticing how light lands on feathers, how water changes a reflection, where an animal is likely to move, and when it is best to remain still. In the Florida Keys, those small decisions can help photographers create images with more atmosphere, context, and care.
Start With the Light, Not the Camera
Early morning and late afternoon can provide softer light, longer shadows, and warmer color than the middle of the day. On a Key West shoreline, low-angle light may bring out texture in sand, detail in mangrove roots, and shape in small waves. Overcast conditions can also be useful because clouds soften contrast, making it easier to photograph pale birds against bright water. Midday sun is not automatically a lost opportunity. Use it deliberately for graphic shadows, bold silhouettes, sparkling water, or close details of leaves, shells, insects, and patterns in the sand. Before lifting the camera, wait a few minutes and watch the background change as clouds move or the subject shifts position.
Read the Scene Before Moving Closer
Wildlife photography improves when observation comes first. Watch for feeding, preening, resting, flight paths, and the direction an animal is facing. A bird may return repeatedly to a familiar perch, while a wading bird may move gradually along the edge of a flat. Instead of walking directly toward the subject, choose a position with a clear view and let the scene unfold. Pay attention to wind direction, sun angle, tide-driven water movement, and visual distractions behind the animal. These details affect both the photograph and the animal’s comfort. Visitors planning outings near protected islands and waters should review access information for the public areas of Key West National Wildlife Refuge before heading out, since conditions and permitted access can vary by location.
Use a Simple, Reliable Field Setup
Expensive equipment is optional. A camera or phone that lets you control focus and exposure is enough to practice the essentials. A longer lens can help maintain distance from wildlife, while a monopod, tripod, railing, or stable surface can reduce camera movement during longer waits.
- Carry a lens cloth for salt spray, humidity, and sudden rain.
- Bring charged batteries, extra storage, drinking water, sunscreen, and insect protection.
- Use a rain cover or dry bag when traveling by boat or working near splashing water.
- Choose footwear that suits the ground without damaging vegetation or entering restricted areas.
Choose Settings That Match the Action
Use a faster shutter speed when photographing birds in flight, quick feeding movements, or animals moving through shallow water. Raise ISO when light fades, then check whether image noise distracts from the subject. Continuous autofocus can help with movement, while a wider aperture can soften a busy background and direct attention to the animal. Technical sharpness is only part of the result. Leave room in front of an animal’s gaze or direction of travel. Check bright feathers, pale sand, clouds, and reflective water for lost highlight detail. A well-exposed image still benefits from a clean background and an intentional composition.
Build Composition Around Habitat
A close portrait can be compelling, but a wider frame may tell a fuller story. Include mangroves, seagrass shallows, shoreline textures, storm clouds, or distant water when they help explain where the animal lives. Reeds, branches, shadows, and reflections can frame a subject naturally without making the scene feel crowded.
Try These Composition Choices
- Photograph both horizontal and vertical versions before leaving a productive scene.
- Change your position to remove clutter instead of relying only on cropping later.
- Use reflections to create symmetry, then break that symmetry with a small movement.
- Place a small subject within a broad landscape when the habitat is central to the story.
Photograph Behavior, Not Just Appearance
Behavior adds meaning. Look for feeding, grooming, courtship, territorial displays, parent-young interactions, takeoffs, landings, or a moment of alert attention. Rather than holding the shutter down continuously, use short bursts when action seems likely. Photograph the moments before and after the main event, too, because preparation and recovery often provide the most revealing gestures. Build a small visual sequence when time allows. A wide image can establish the habitat, a medium frame can show behavior, and a close detail can reveal texture or expression. Together, those images can describe more than a single isolated encounter.
Follow Ethical Wildlife Photography Practices
A photograph is not worth disturbing an animal or damaging a habitat. Keep a respectful distance, never block an escape route, and step back if an animal changes its behavior because of your presence. Do not bait, call, chase, touch, or crowd wildlife for a picture. Avoid revealing precise locations for vulnerable species when public attention could create additional pressure. Stay on designated paths where required, respect closed areas, and follow site-specific rules. Florida State Parks advises photographers not to disrupt wildlife habitat or enter areas that are marked as closed to visitors, principles that apply well beyond park boundaries.
Document Beauty, Change, and Recovery
Nature photography can record more than scenic moments. Return to the same viewpoint over time to document seasonal water levels, shoreline change, restoration work, flowering cycles, or shifts in vegetation. Keep notes on the date, weather, general location, and conditions so your images retain useful context. Edit with restraint. Begin with exposure, cropping, straightening, and modest color correction. Remove only distractions that do not alter the meaning of the scene. When sharing, write captions that identify the habitat, season, and behavior when known, and avoid dramatic claims that the image cannot support.
A Simple Key West Field Workflow
- Check access conditions, weather, sun position, and local rules before leaving.
- Arrive early enough to observe before photographing.
- Choose a safe, low-impact position with a clean background.
- Set exposure for the brightest important part of the frame.
- Wait for natural behavior, better light, or a clearer composition.
- Review focus and highlights quietly, without losing awareness of the surroundings.
- Leave the area as you found it, with wildlife and habitat undisturbed.
Conclusion
Thoughtful wildlife photography in Key West, Florida, starts with attention. Light, wind, water, behavior, habitat, and ethics all shape the final image. Slow down, observe longer, and make smaller adjustments in the field instead of rushing from one subject to another. Pay attention to how animals respond to people and changing conditions, and give them enough space to behave naturally without unnecessary disturbance. The coastal environment can also change quickly, so patience can help photographers work with shifting light, tides, reflections, and weather rather than fighting against them. The result can be more than a pleasing photograph. It can become a respectful record of a species, a moment, and the coastal environment that makes that moment possible. With responsible field practices, each photograph can also help preserve an appreciation for the wildlife and habitats that make Key West unique.